Step 1: Create a new document
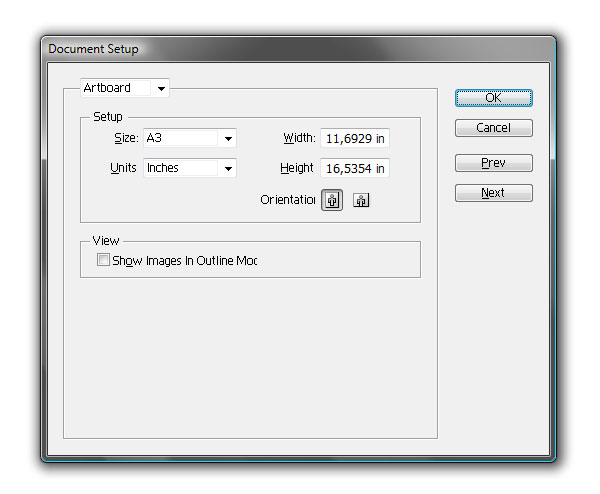
Create a new document, since this is going to be a poster we need a large area to work with. Make it A3 size (297 x 420 millimetres or about 11,7×16,5 inches).
Step 2: Create layers, background and crop marks
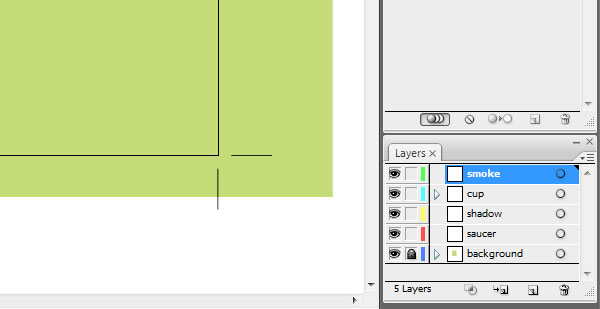
Before we start, it is very important to keep everything organized. So please make a few new layers and name them:background, saucer, shadow, cup and smoke. Now select the background layer, grab the Rectangle Tool, draw a rectangle bigger than the page size and lock the layer so you won’t accidentally move it. I used #CAD980 for the nice fresh green color.
Now make sure you have no objects selected and go to Object>Crop area>Make to create crop marks for your document. It’s a nice little feature which will help you during the export of your file to a different format. It will adjust the document area to the crop marks and ignore any objects outside the artboard.
Step 3.1: Creating the saucer
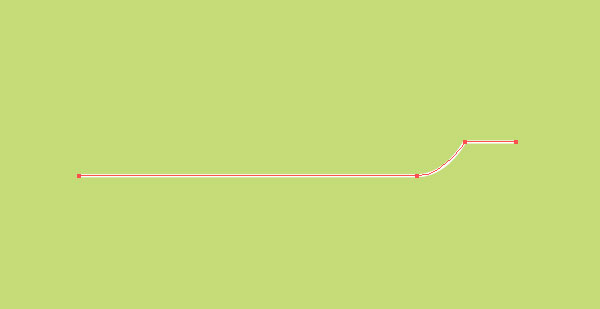
Select the saucer layer and using the Pen Tool draw a line similar to the one in the picture, give it a white stroke with weight of 2 pt. It will be a basis for our saucer.
Step 3.2
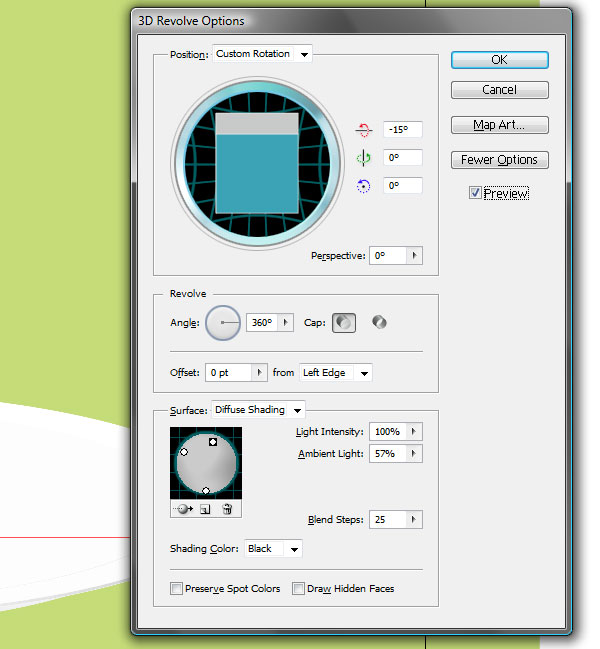
Go to Effect>3D>Revolve, to transform the line into 3D shape. Use settings from the picture below. Additionally you will need to setup the light points, and their strength. In my project each of the three light points have the same Light Intensity and Ambient Light value.
Your shape should resemble this:

Step 3.3
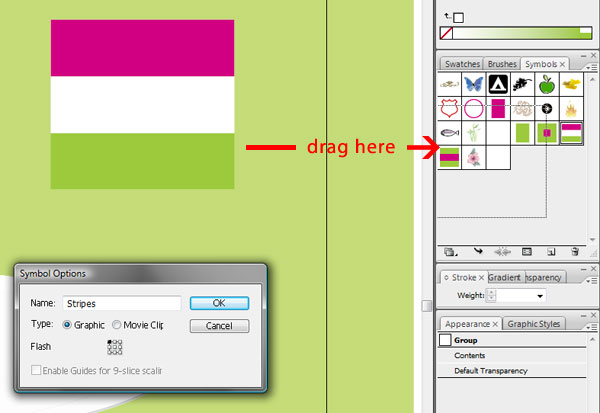
To make the stripes at the rim of the saucer we first need to draw 3 rectangles of the same width and height, align them like in the picture below, group them and drag the group to the Symbol panel.
Name the symbol as Stripes set its type to Graphic and click OK. By doing this we convert our three rectangles into a symbol, to be able to map that symbol onto our 3d shape in the next step. (Colors used: #BD127C – magenta,#A8C653 – lime green)
Step 3.4
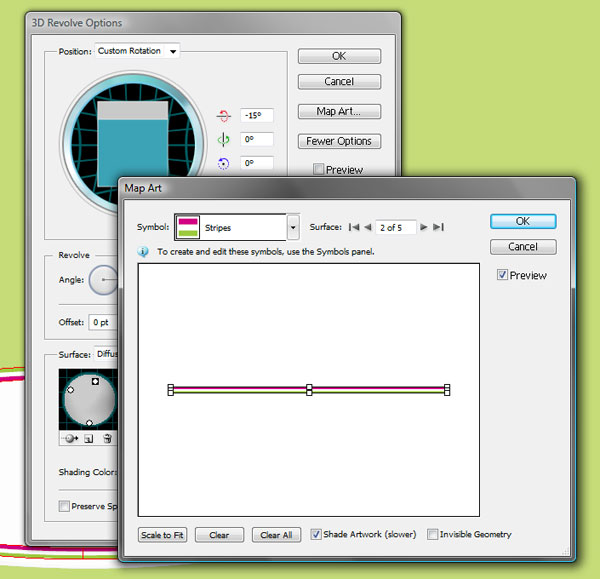
Select the saucer, go to the Appearance panel and double click 3D Revolve option. In 3D Revolve options panel select Map Art, go to surface 2 and select Stripes symbol from the drop down menu. The symbol will appear in the surface preview area. Click the Scale to fit button and check the Shade artwork option, so the lights we adjusted earlier will affect the mapped symbol.
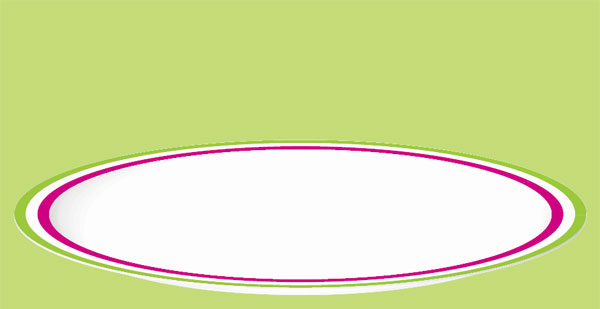
The saucer is ready, it should look like the image below:
Step 4: Creating the cup
Now that we’ve created the saucer it’s time to create the coffee cup.
There are two ways to do it, you may draw the whole shape at once like I did, or you may take the "precision way" :-), and draw only half of the shape, duplicate it, reflect it, and join the two halves together.
Hide the saucer layer, select the cup layer, grab the Pen Tool and draw a shape like that, but don’t connect the highest and the lowest point.

Duplicate the shape by copying it (Edit>Copy) and pasting it in front (Edit>Paste in Front). Reflect the new shape vertically by double clicking the Reflect Tool, and checking the vertical axis.
Put the shapes close to one another so their end points overlap. Select the top points by dragging over them with theDirect Selection Tool, right click and select Join. Do the same with the two points at the bottom of the shape.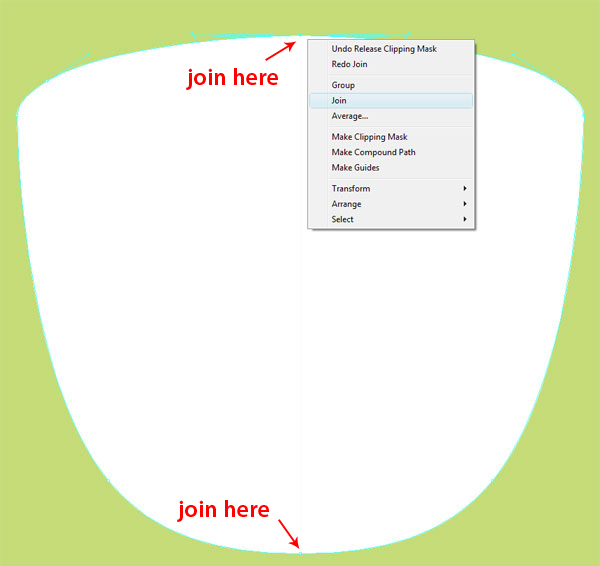

Step 4.1
Take the Ellipse Tool, and draw two ellipses just like on the picture below. The gray ellipse will serve as an inside wall of the coffee cup, give it a nice gray color: #EDEDED. The second one will simulate the coffee and it should have a really dark chocolate/coffee type of color: #1D1C1D

Step 4.2
Open the Pathfinder panel (Window>Pathfinder), select both ellipses that we just drawn and click Divide on thePathfinder panel. The Divide command cuts selected objects in places where they overlap one another, so now you should have three separate shapes instead of two ellipses.
Since pathfinder automatically groups shapes press Ctrl+Shift+G to ungroup them. Then, select the bottom most shape and delete it, we won’t need it.
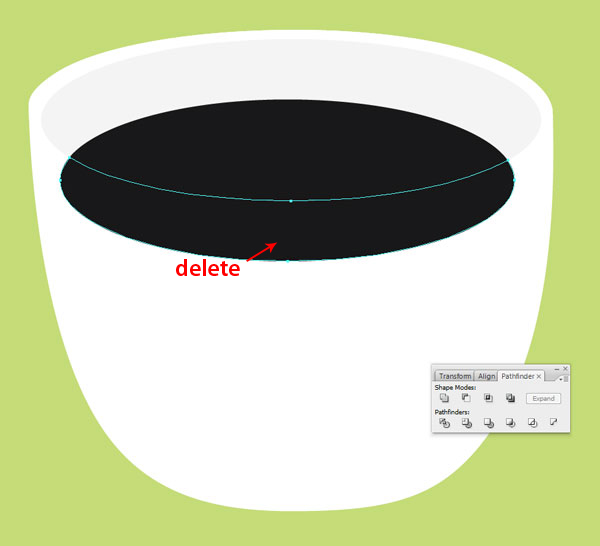
Your results should look like this:

Step 4.3
No we will use the gradient mesh tool to simulate the coffee foam. Select the coffee shape and convert it to gradient mesh by clicking Object>Create Gradient Mesh. Make it 6 columns, 6 rows with flat appearance.
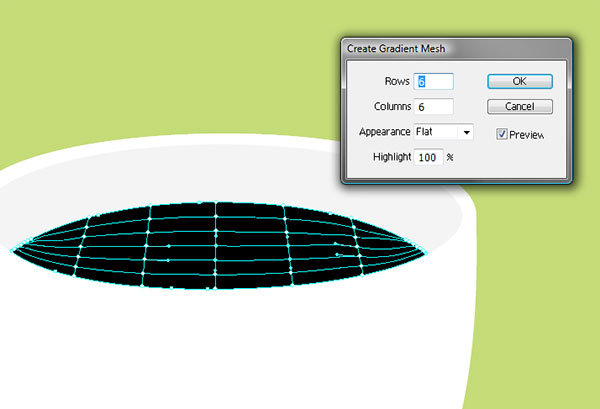
Step 4.4
Now take the Lasso Tool, make a selection as indicated on the screenshot below and give it a light brownish color. My color is #694E56.
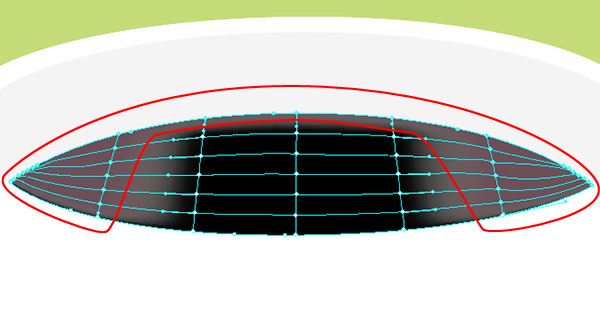
Step 4.4
Drag the indicated mesh points to the area outside the mesh:
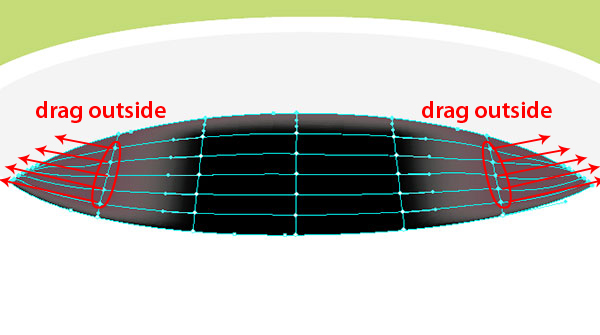
You should get something like this:
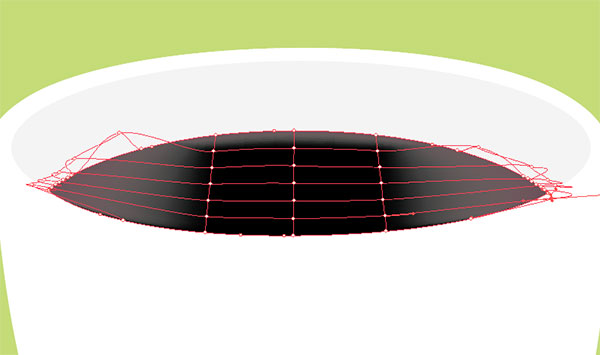
Step 4.5
Now move the other points like this:
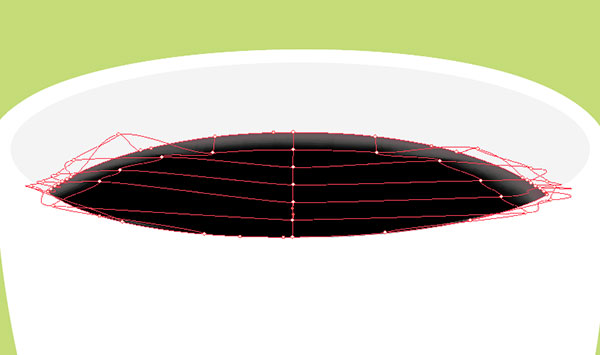
Tweak the mesh a little, adjust the colors, your outcome should resemble the picture below::

Step 4.6
The only thing our cup lacks now is the ear. Select the Pen Tool and draw the shape like in the picture below. Give it a light grey colour, like #EBEBEB. Remember to put it on the very bottom of the cup layer.
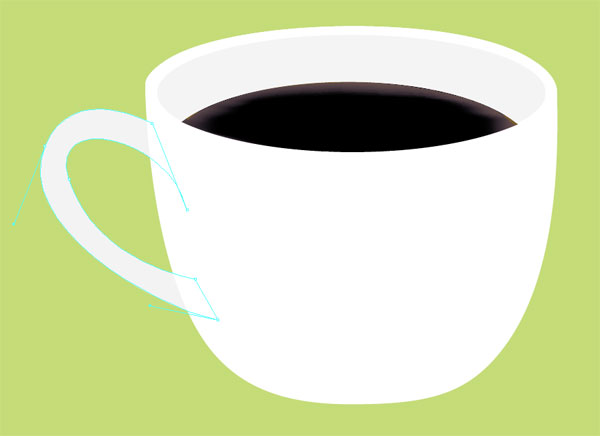
Now use the Pen Tool to draw a few highlights over the ear shape just like that (don’t worry about the highlights sticking out of the ear shape we will fix it soon):

Use the layers panel to bring the ear shape over the highlights:

Select the ear and the highlights, and press ctrl+7 or go to Object>Clipping Mask>Make. Your ear shape will become a clipping mask for the highlights, and will become invisible.
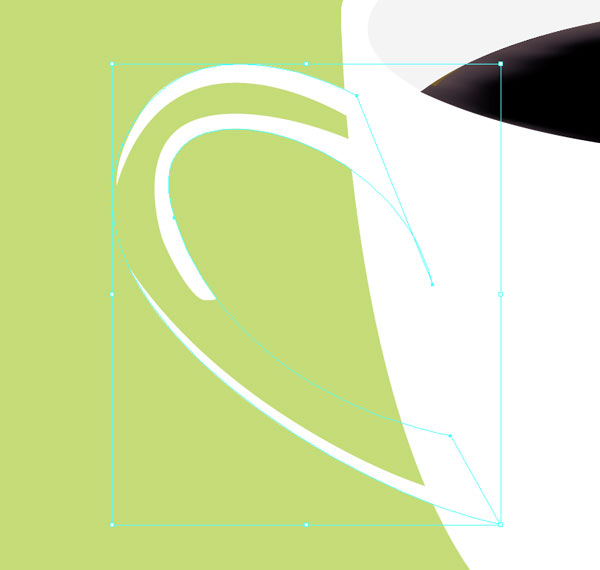
To make the ear visible again, find it on the layers panel and select it. Give the ear the same color as before (#EBEBEB). The effect should look like this:

Step 5: Adding detail to the cup
Since the basis of the cup is ready, it’s time to add some detail to it. We’ll start with the striped pattern.
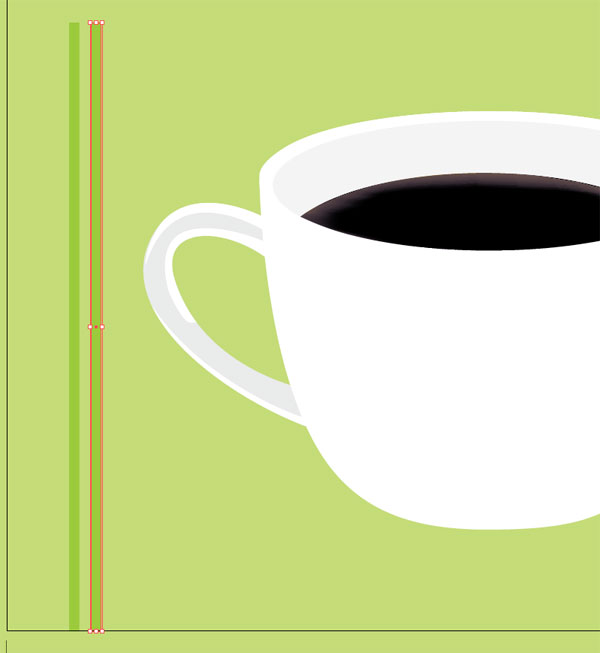
To get started draw a long green (#A8C653) vertical rectangle, and duplicate it by holding the mouse button with Alt and Shift while you drag it.
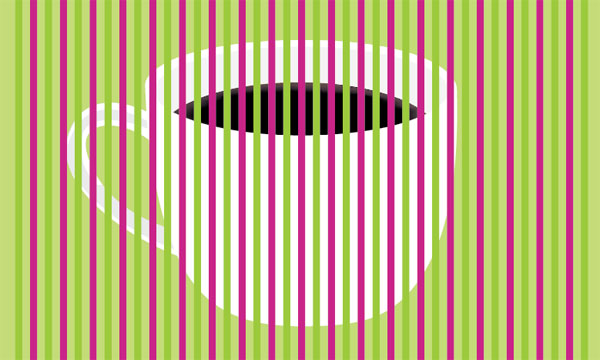
With the duplicated rectangle still selected, press ctrl+D about 40 times to flood your screen with rectangles :-) Fill every other rectangle with bright pink color (#B94284).
Step 5.1
Group all the rectangles, copy the main coffee cup shape and paste it in front (ctrl+F).
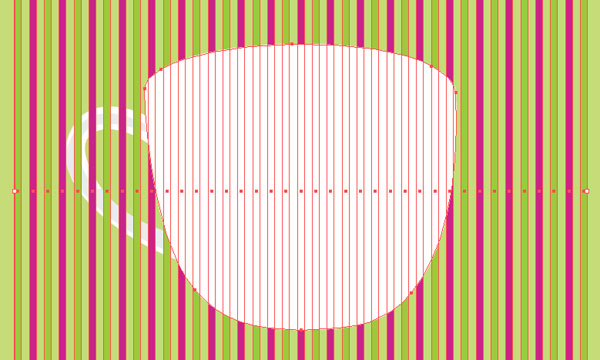
Now select the shape and the stripes and go to Object>Envelope Distort>Make with Top Object.
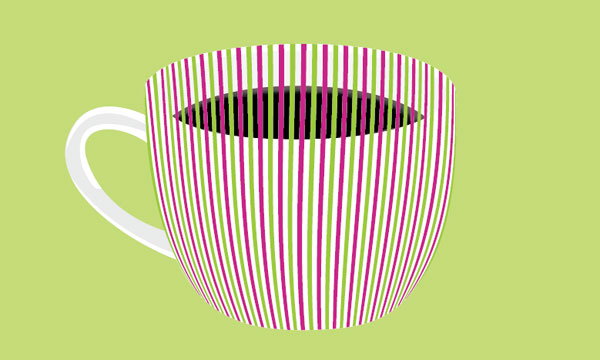
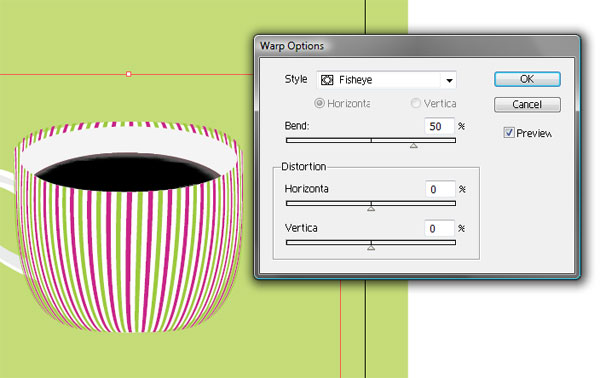
Select the pattern, go to the layers panel and put it below the coffee shape, and the inside of the cup. Next, go toEffect>Warp>Fisheye, set the Bend parameter to 50 and click OK.
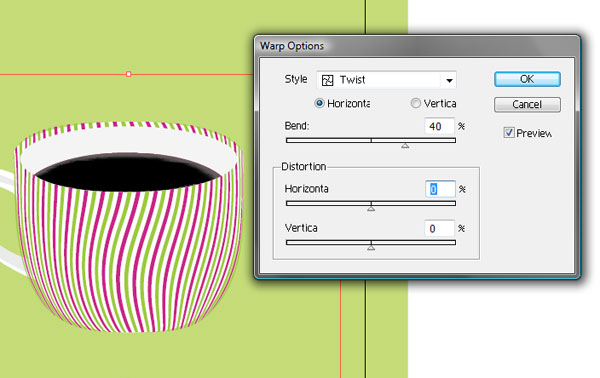
Keep the pattern selected and go to Effect>Warp>Twist. You will be notified that "This will apply another instance of this effect". Just click "Apply New Effect" because this is what we need to apply the second effect. Select the Horizontal option, and set the Bend value to 40.
Now you can obviously see that the pattern is getting outside the cup, this is an undesired effect. To get rid of it we need to "lock" the pattern inside a clipping mask.
Once again copy the cup shape and paste it in front.
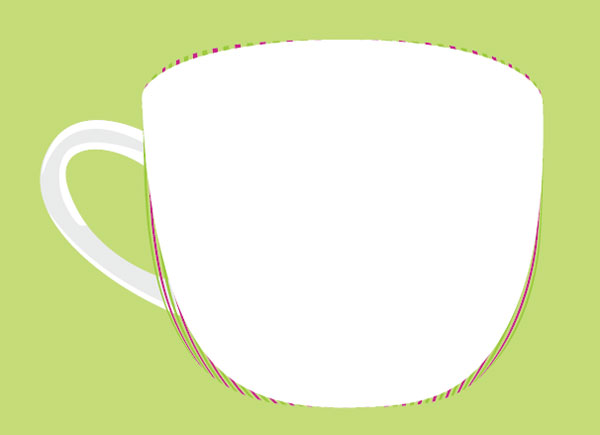
Select the shape and the pattern and press ctrl+7 to put the pattern inside the clipping mask.
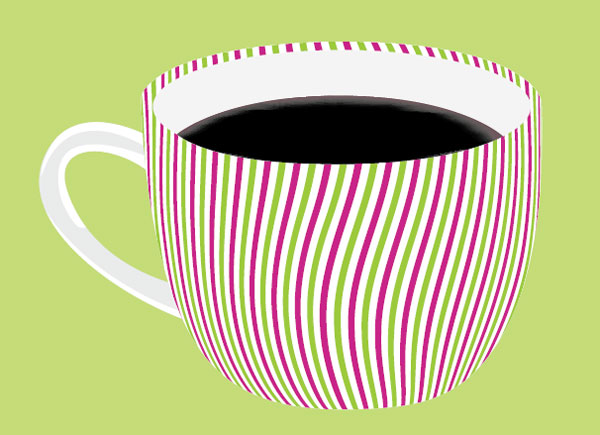
Now create a white ellipse covering the top of the cup. It will cover the unnecessary parts of the pattern and give the illusion that our cup has thick edges.
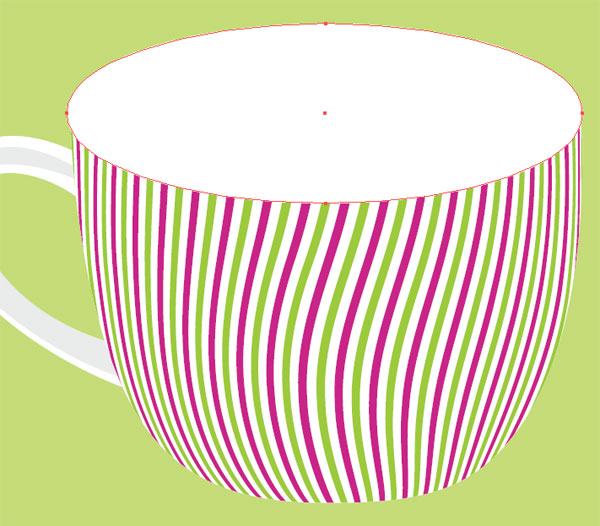
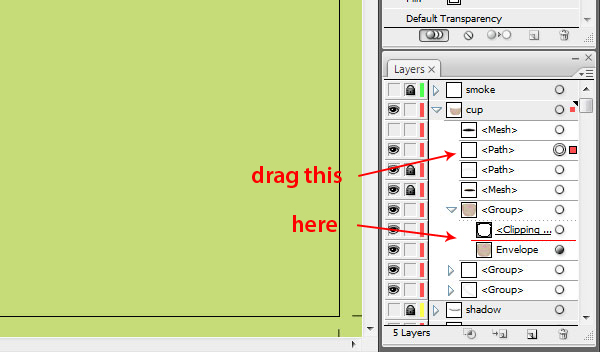
Find the ellipse on the Layers panel and put it inside the clipping mask that we created in the previous step.
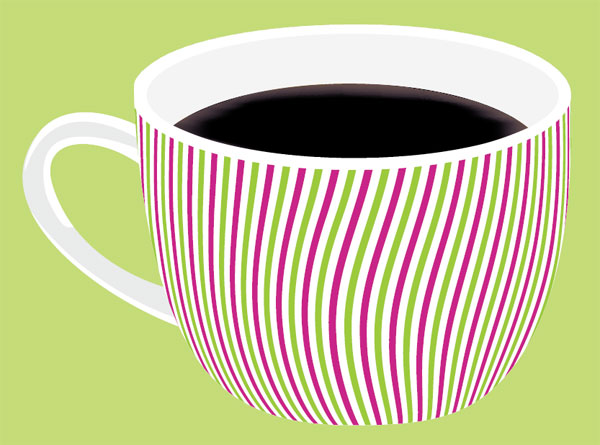
The effect should look like this:
Step 5.2
In this step we will use the blend tool to give the cup some shading. Start with selecting the clipping path of the cup and the ellipse that we just made.
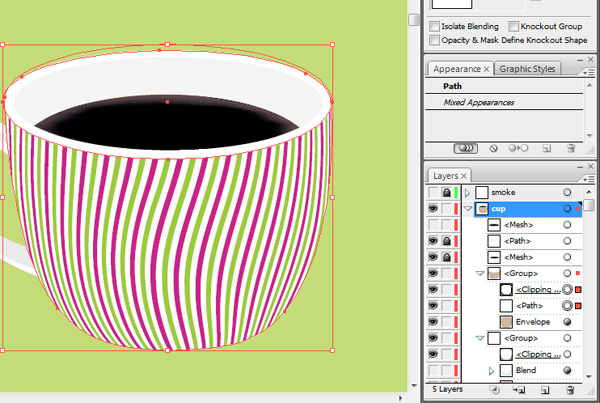
Copy the shapes, paste them in front and click Divide on the Pathfinder panel. After doing this you will see a new group on the Layers panel. Expand the contents of the group and delete the first two objects.
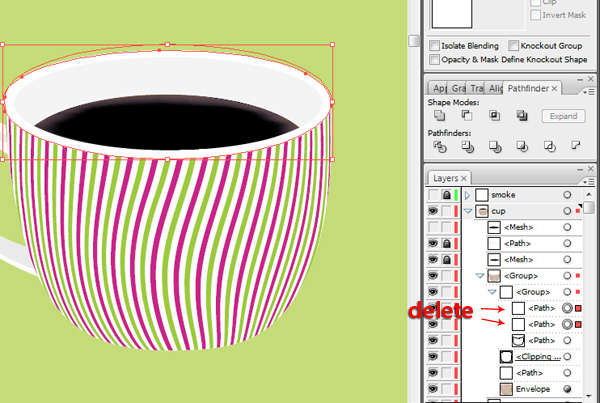
Now select the only shape that’s left inside the group and hit ctrl+shift+G to ungroup it. Copy it and paste it in front(ctrl+F), then scale the copy down and move it up over to the edge of the cup.
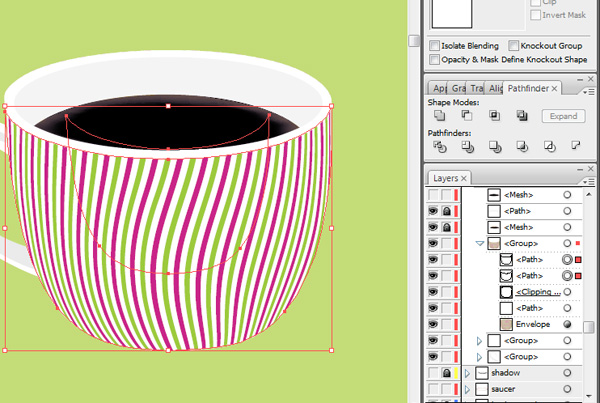
Fill the bigger shape with black and the smaller shape with white. Double click on the Blend Tool and choose "Smooth Color" from the Spacing list. Now while having the Blend Tool and both shapes still selected click on the black shape and then on the white shape to obtain shading effect like on the picture below effect:
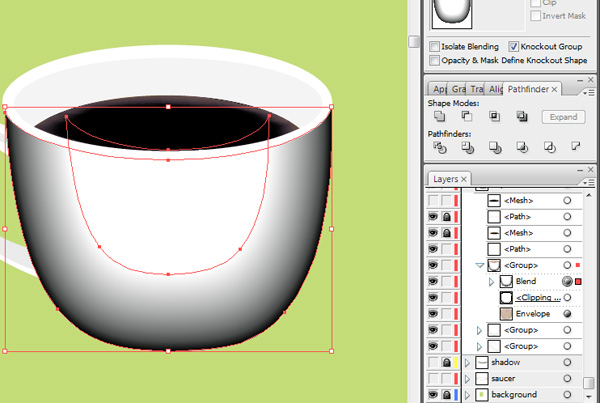
This is certainly far from what we want our image to look so we have to tweak some settings :-)
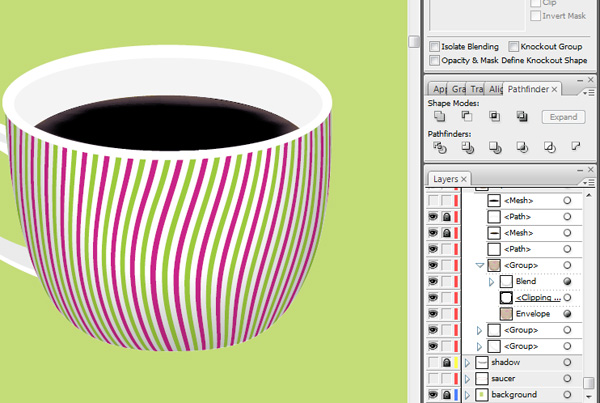
Select the blend, set its blend mode to Multiply and bring the Opacity down to 25. It should look like this:
Step 6: Creating shadows
This step is fairly simple.Turn off the cup layer, select the shadow layer and draw a shape resembling a shadow of the cup. Fill it with black. It should be similar to the one on the picture below. Pen or Pencil are the best tools for the job.
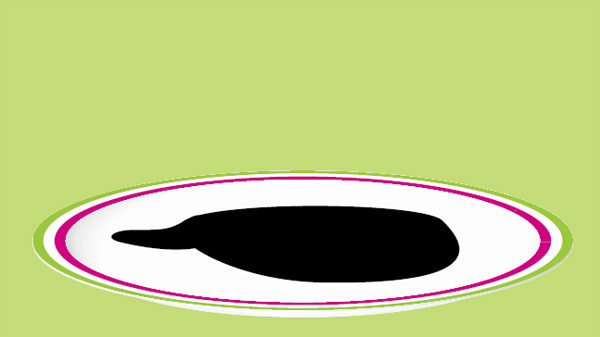
Change the shadows opacity to 15% and go to Effect>Stylize>Feather. To slightly blur the edges of the shadow.
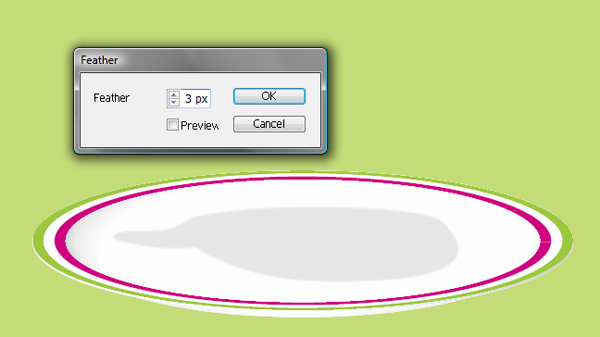
Now turn on the cup layer and position the shadow so it aligns well with the cup.
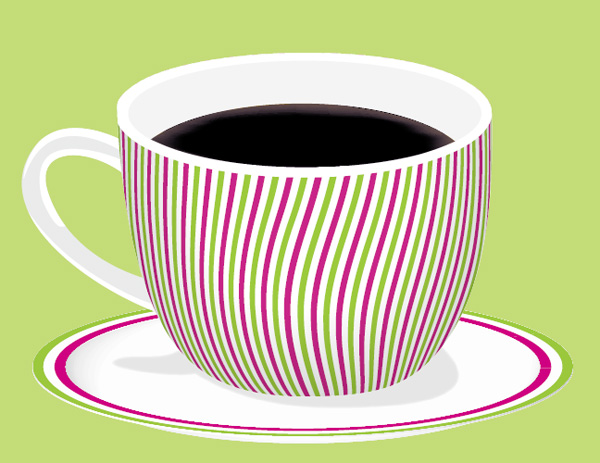
Step 6.1
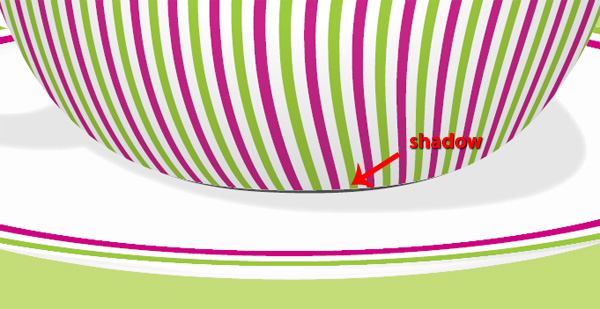
Turn off the cup layer again. This time we will draw a shape that will be used as a dark shadow directly underneath the cup. Take the Pen Tool and draw a thick line just like in the picture below. Lower its opacity to 85%.
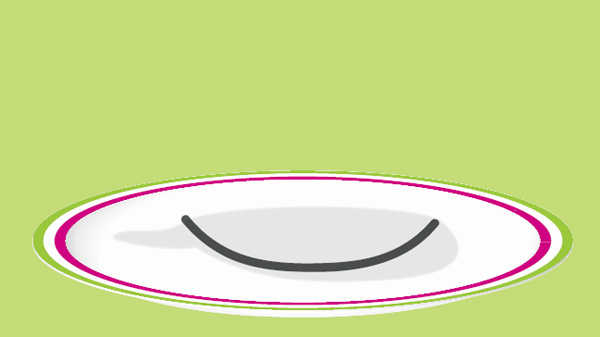
Turn the cup layer on and position the shadow properly underneath the cup. You will probably need to tweak points and handles on the curve to make it look good.
Step 7: Adding steam
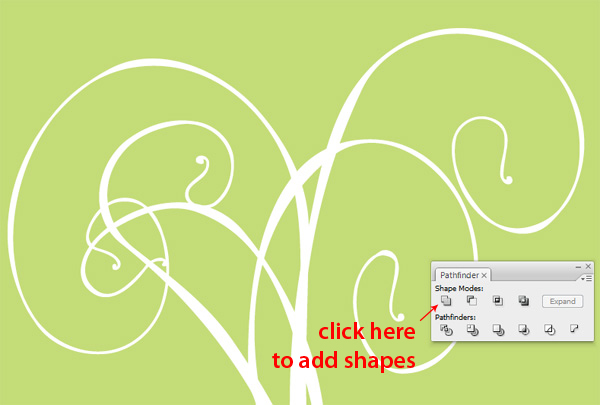
Select the Pen Tool or the Pencil Tool and start to draw a steam-like organic object. Be creative :-) There is no automatic way to do it, you just need to imagine the shape and draw it.
The best way to do this is to start from the bottom and draw every "branch" as a single shape. You can connect everything later by using the "Add" option in the pathfinder.
Step 7.1
Lower the opacity of the smoke object to 70%, copy it and paste it in the back by using ctrl+B or Edit>Paste in Back.Offset the copy a little to the left and lower it’s opacity even more, to about 30%.

Step 7.2
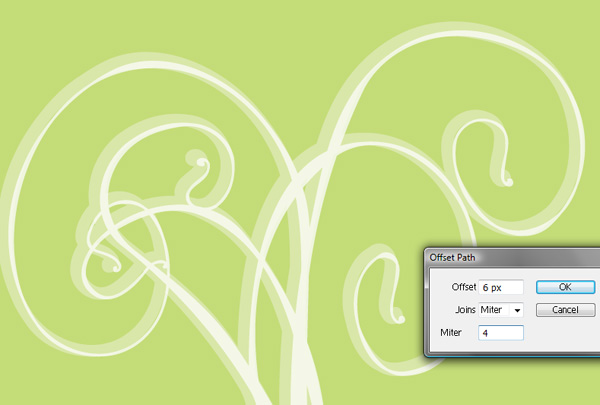
The shape in the back is barely visible right now. We need to take care of that by making the shape in the back thicker. Thicker, not bigger so scaling the shape is out of the question.
Select the shape, go to Effects>Path>Offset Path and enter 6 px in the offset value field, leave the other options unchanged.
Step 8: Background
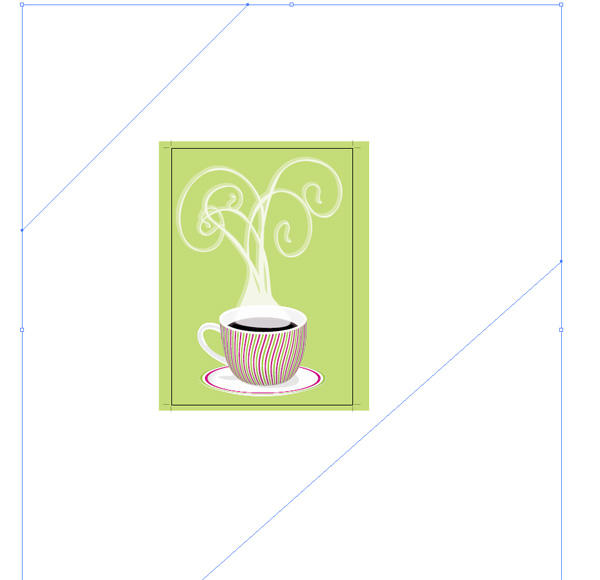
To make the striped background, draw two really long lines with 0.75 pt white stroke outside of the artboard, and rotate each of them 45 degrees.
Step 8.1
Select the Blend Tool and click on both shapes to make a blend from them. After this double click on the Blend Toolin the tools panel. From the Spacing list select Specified Steps and enter 100. The lines will be duplicated 100 times to form a striped pattern.
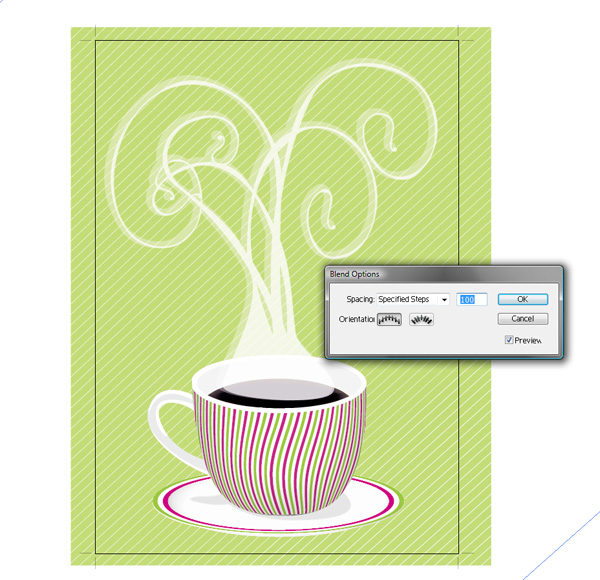
This is the end of the tutorial. In case you had any problems with following the steps feel free to contact me.


0 nhận xét :
Post a Comment
▄▀▄▀▄▀▄ -HAHEINEKEN.BLOGSPOT.COM ▄▀▄▀▄▀▄
- viết một nhận xét nếu thấy bài nào có ích
HƯỚNG DẪN DOWNLOAD TRÊN ADF.LY:
- Bấm nút download, Đợi 5 giây
- Rồi bấm vào hoặc
ở góc trên bên phải.