

A few times a each month we revisit some of our reader’s favorite posts from throughout the history of Vectortuts+. This tutorial by Irmi Arieli was first published on March 9th 2009.
One of the most amazing and confounding tools in Adobe Illustrator is probably the Gradient Mesh tool. Working with this feature allows the user to divide almost any shape into a mesh. Each intersection of two lines (horizontal/vertical) can be colored with a solid color. This tutorial takes a different format than some of our other tuts, and will help you work with the Mesh tool better.
In this tutorial, we’ll show you some tips that will improve your Mesh work. We’ll also show you a proper workflow to get outstanding results with this tool. We’ll take a close look at creating a layer within the detailed file of a meshed boot. The final design is available for review in our freebies section, and is titledArmy Shoe. Let’s get started!
1. Introduction
I would like to thank Itai Lustgarten for co-writing this tutorial. Itai is a fellow graphic artist, designer and lecturer. We have both been in the industry since 1990. We both teach Illustrator, Photoshop and pre-press procedure in Mentor academy and several academies in Israel.
2. Creating a Basic Mesh
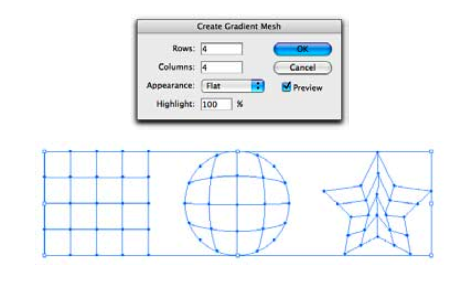
After selecting a shape (non compound shape, choose Create Gradient Mesh from the object menu. At the command window you can define the structure of the mesh – the number of rows and columns. Notice the mesh lines defined by the original outline of the shape.
3. Adding Points to a Mesh
Another way to add a point to a mesh is by using the Mesh tool and clicking anywhere in the shape’s area.

4. Colorize The Mesh
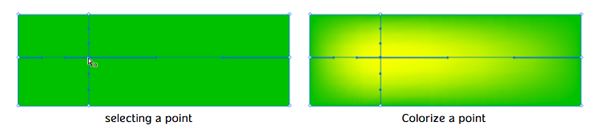
After converting a shape into a mesh, you can select points with three tools: Mesh tool, Direct selection tool, and the Lasso tool. All you have to do now to add color to the mesh is select a color from the swatches palette, or use the eye dropper tool to select a color from an image.
5. Moving Points
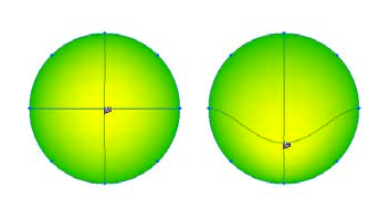
If you need to move a point on the mesh shape, choose the Mesh tool or the Direct Selection tool, then click on a point and drag it (holding the Shift key will drag the point in a horizontal/vertical line only).
6. Meshing With Shapes
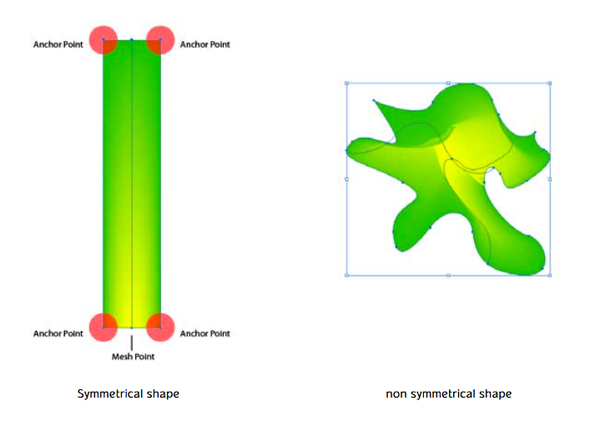
In order to achieve the best result with a mesh, one has to use a symmetrical shape since the mesh uses an equal number of anchor points on each side of the shape. The problem is what happens when we want to make a complex shape. Look below at the result of the non-symmetrical shape versus a symmetrical shape.
The solution could be split into two parts. The first one is to start with a rectangle or an ellipse, convert them into a mesh and then distort them to the shape we want. The second solution is to work with multi-parts, which are symmetrical shapes – one on top of the other.
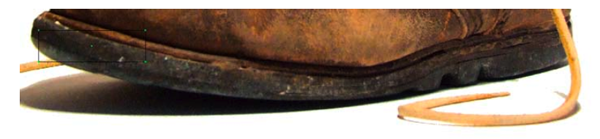
7. Place The Image
The army shoe image can be download here. When placing an image to work upon, the most efficient way is to place the image into a template layer without dimming.

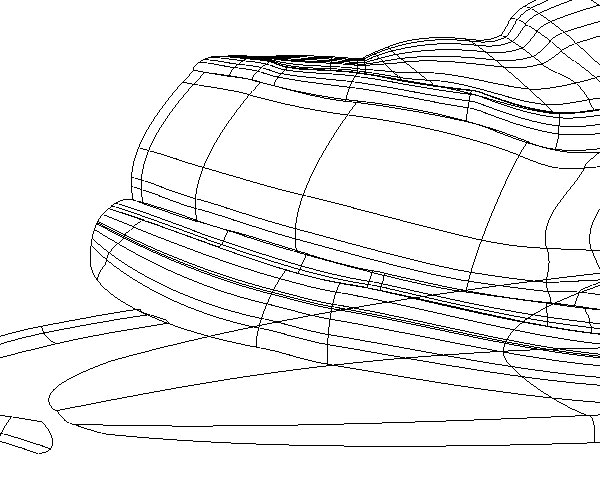
8. Preview and Outline
Going between preview and outline view modes is a must. While meshing 80% of the time will be spent in an outline view mode. An example from the final boot is shown below.
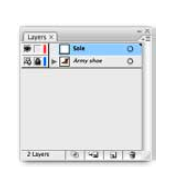
9. The Building Process
It’s important to break the image apart into layers. This way you can work separately on the shoelace, shoe sole, and other parts on separate layers. Let’s take a look at working on the shoe sole. First, double-click on “layer1″ and change its name to “Shoe sole.”
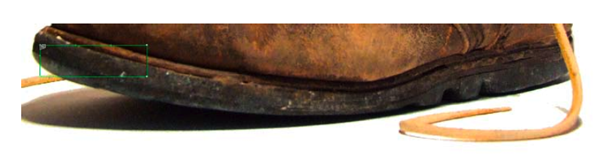
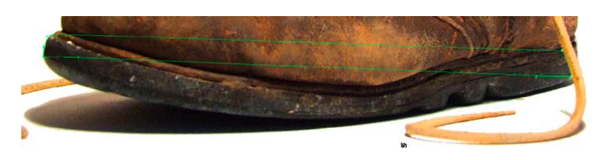
Step 1
Draw a rectangle at the left side of the shoe sole (and change the view mode to outline).
Step 2
Use the Mesh tool (u) to click on one of the four anchor points of the original rectangle. This will
convert the rectangle to a mesh object without adding any unused lines.
convert the rectangle to a mesh object without adding any unused lines.
Step 3
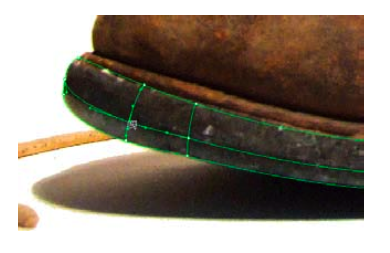
With the Mesh tool, move the two right points of the rectangle to the right edge of the shoe sole and play a bit with the anchor handles to match the shoe sole.
Step 4
Pay attention to the color flow direction. Any hoizontal/vertical line that you add to the mesh will flow between the existent two. Use the Mesh tool (u) to click on the bottom mesh line thereby adding a vertical mesh point. Drag it down to fit the shoe sole. Do the same adjustment to the top mesh point.
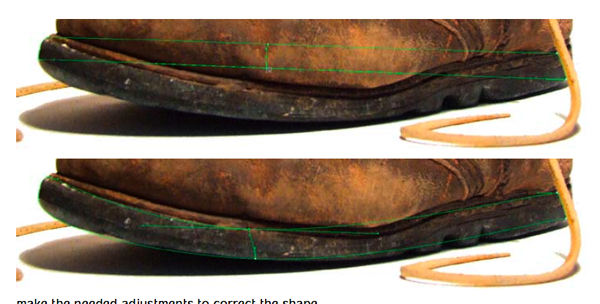
Step 5
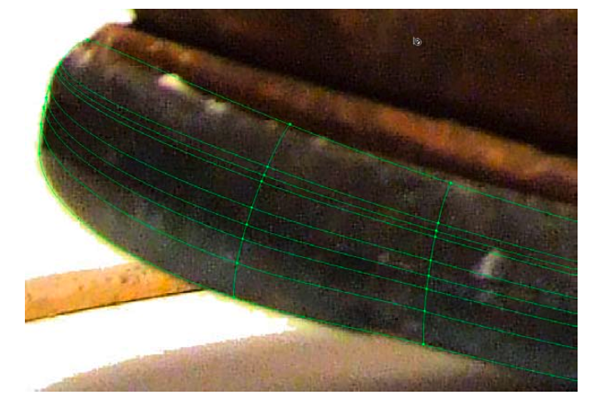
Make the needed adjustments to correct the shape. Add more points along to the horizontal line of the shape to adjust the mesh to the shoe sole.
Step 6
After adding the points, it is time to use the Eye Dropper tool to color them. Select each point and
use the Eye Dropper (i) to sample a color from the image below (do it in an outline mode).
use the Eye Dropper (i) to sample a color from the image below (do it in an outline mode).
Step 7
Look closely for a change of color. Where you see a color difference place a mesh point and color it.
Step 8
Follow the horizontal line and move the mesh points along the shape according to color change.

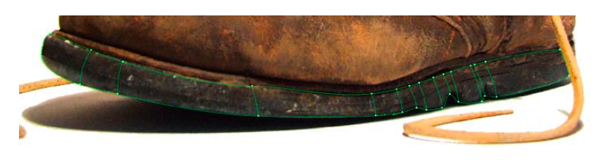
Step 9
We’ll be making stops in this step. Wherever you identity contrasting colors there is a need to add more points – therefore stopping the color flow. Going from outline to preview mode is advised.
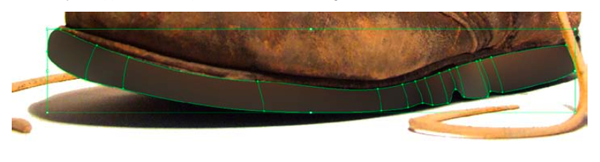
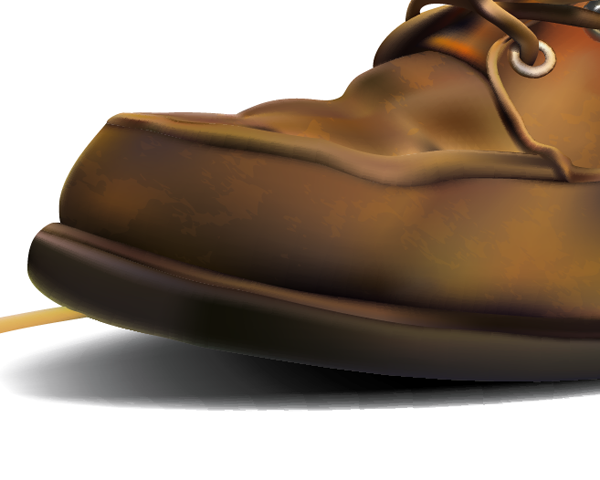
All there is to do now is just go through all the points and color them. Once you’re done, make a new layer and move on to the next part you want to mesh. You can see a close-up result of the toe and sole in a crop of the final vector shown below.
10. Conclusion
Patience when meshing is a must to achieve a good results. Also, keep in mind that symmetrical shapes are the best way to work when meshing. The final design is available for review in our freebies section, and is titled Army Shoe. Have fun practicing these techniques on your own illustrations!

Subscribe to the Vectortuts+ RSS Feed to stay up to date with the latest vector tutorials and articles.

0 nhận xét :
Post a Comment
▄▀▄▀▄▀▄ -HAHEINEKEN.BLOGSPOT.COM ▄▀▄▀▄▀▄
- viết một nhận xét nếu thấy bài nào có ích
HƯỚNG DẪN DOWNLOAD TRÊN ADF.LY:
- Bấm nút download, Đợi 5 giây
- Rồi bấm vào hoặc
ở góc trên bên phải.